
4.3. Pangolin Flashback 4 internal - DMX control
How to control the Laser via DMX
Custom content can be stored to the mainboard's internal SD card and can then be triggered via DMX. Even though the Laser mainboard already comes with a large set of preset frames and animations, it is possible to completely customize all the content. The frames and animations are comparable to "Gobos", like in conventional lighting, but these "Gobos" in lasers can not only be static, but be animated, colorful and easily customizable. The Laser system comes with a free, full feature software that allows for creation of custom content, which then can be loaded to the Laser's memory.
1. Connection schematics - how to wire the DMX cable
In most cases the Laser shall just be triggered with a normal lighting desk / lighting software, so the lighting desk is the signal sender and the Laser receives the control commads from the lighting desk / lighting software.
This is the schematics for the standard DMX control wiring for the Laser with FB4:
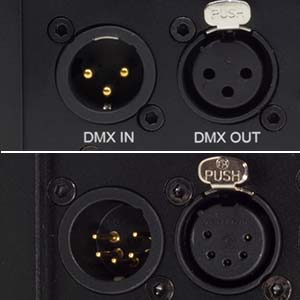
1. Use standard 5-pin DMX cable to wire the DMX console / DMX-interface with the laser.
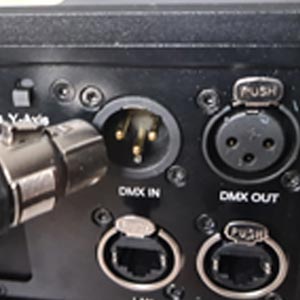
2. Plug the DMX cable into the laser. DMX signal goes female connector first.
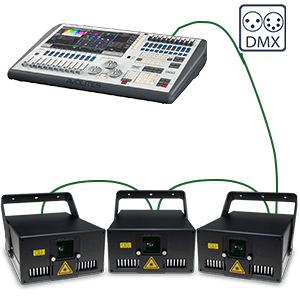
3. Connect the DMX console / DMX control interface with the first laser, then daisy chain the DMX line from one laser to the next. It is also possible to have other DMX fixtures in the same "DMX line" (universe)!
2. Set the DMX addresses for each device
- Configure the DMX operation mode:
Turn the selection rotary dial until the cursor points to the menu item "Operation mode" and press it once to expand the menu options: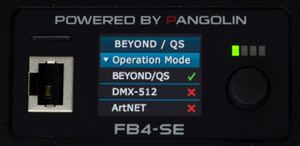
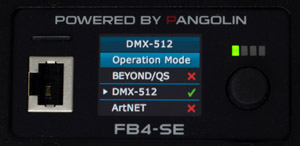
- Turn the rotary dial until the cursor points to the desired operating mode (DMX-512) and press it once. The selected operation mode (DMX-512) is now active:
- Turn the selection rotary dial until the cursor points to the menu item "DMX Settings" and press it once. The following settings become available:
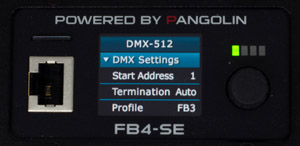
- Start Address: Determines the DMX start address of the FB4 Fixture.
- Termination: Determines if the FB4 will terminate the DMX cable after the DMX signal comes in.
Termination is done at 120Ω
Options:- Auto: The FB4 determines itself if termination is needed
- On: Termination is always enabled
- Off: Termination is always disabled
- Profile: Determines which Fixture profile is active.
- FB3: 16 channel DMX/Artnet fixture profile is active
- FB4: 39 channel DMX/Artnet fixture profile is active
- The FB4 has an adjustable timeout period for DMX. If no DMX frames where received within the specified period, output will stop. This value should be adjusted so that output does not stop too early, when the DMX framerate is low, but still in a timely manner when the DMX source disappears. (the default value is 3.0)
3. Set the DMX profile for each laser - 16 or 39 channels
You can choose which DMX profile to use in "DMX Settings" menu option.
Use the DMX OUT feature of the Laser mainboard
The FB4 allows you to utilize the FB4’s onboard Serial port as DMX output for, for example gratings. This connection is not meant to control external DMX fixtures as this is not a standard DMX signal.
The FB4 hardware is equipped with a serial port that is capable of generating DMX output for control of DMX controllable hardware inside Laser Projectors. This DMX function does not require the FB4 DMX daughter board to operate. You can use this serial port for control for diffraction gratings and other hardware internal to the laser projector. This means that when the in the software DMX is enabled, the FB4 is able to forward incoming DMX signals through the serial port.
BEYOND internally has 4 universes for “DMX OUTPUT”. In total this will allows you to output 2048 DMX channel values. A part of this array can be sent through the FB4 its serial port.
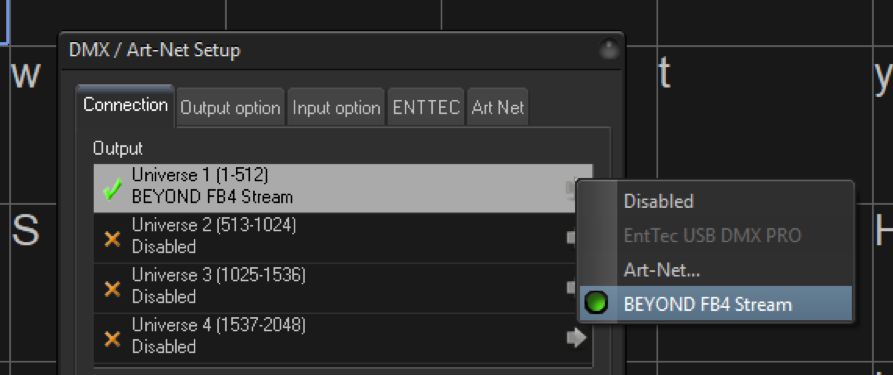
For example, QuickDMX can be used for creating DMX sequences. Additionally, in BEYOND Ultimate Fixtures and the Object Animator can be used to generate a DMX signal. The DMX signal will only be sent when the “Enable Laser Output” button inside QuickShow or BEYOND is activated. Secondly. at least one of the four DMX Universes of BEYOND must be enabled. If all 4 outputs are disabled, BEYOND will not generate any DMX signal.
Note, if no additional DMX output is required, use mode “BEYOND FB4 stream” mode to enable DMX output through the serial port on the FB4 as shown in the image below.
How-to Enabling Onboard DMX out
Click the “Enable routing…” checkbox to enable output of DMX through the FB4.
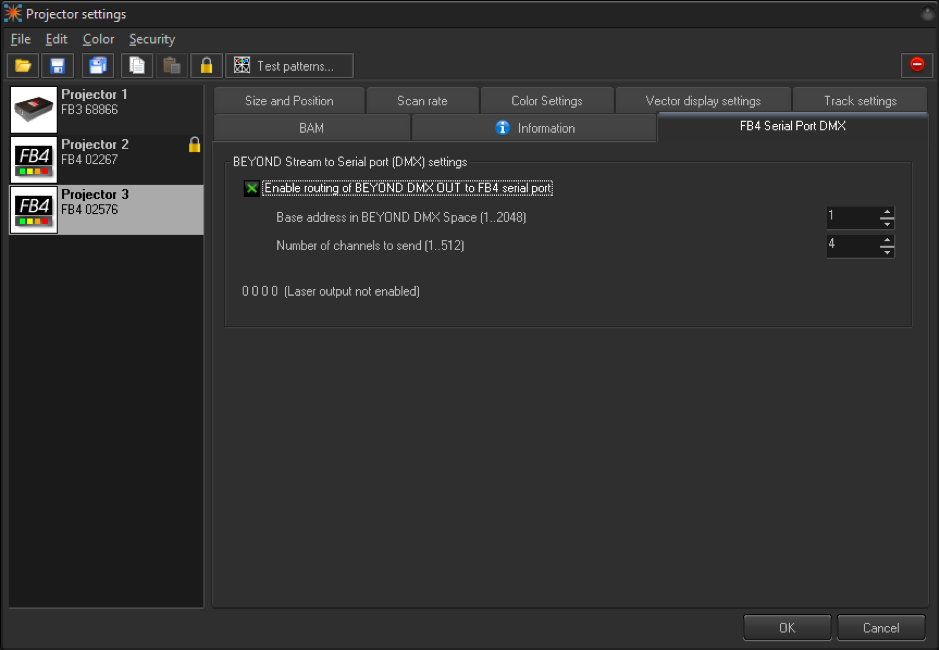
The “Base address” defines the positions of the 1st channel in BEYOND’s output DMX array. “Number of channels” defines how many DMX channel values are passed through to the serial port, so in the example above we choose base address 1 with 4 channels to send, so BEYOND will send to the channels 1, 2, 3 and 4 through the FB4.
How to calculate the “base address”
To convert 4 DMX universes to a Base address, a simple calculation can be done.
Calculate 512 addresses for each universe.
The base address for universe 1,DMX address 1 is 1
The base address for universe 2, DMX address 1, is 513
The base address for universe 3, DMX address 1, is 1025
The base address for universe 4, DMX address 1, is 1537
The base address for universe 2, DMX address 128, is 640
(512 + 128 = 640)
Distributed brands: